Webiny Enterprise
Okta OIDC App Integration
Learn how to configure Okta OIDC app integration.
Webiny Enterprise license is required to use this feature.
- how to configure OIDC app integration in Okta dashboard
- how to map Okta groups to Webiny Roles
OIDC App Integration
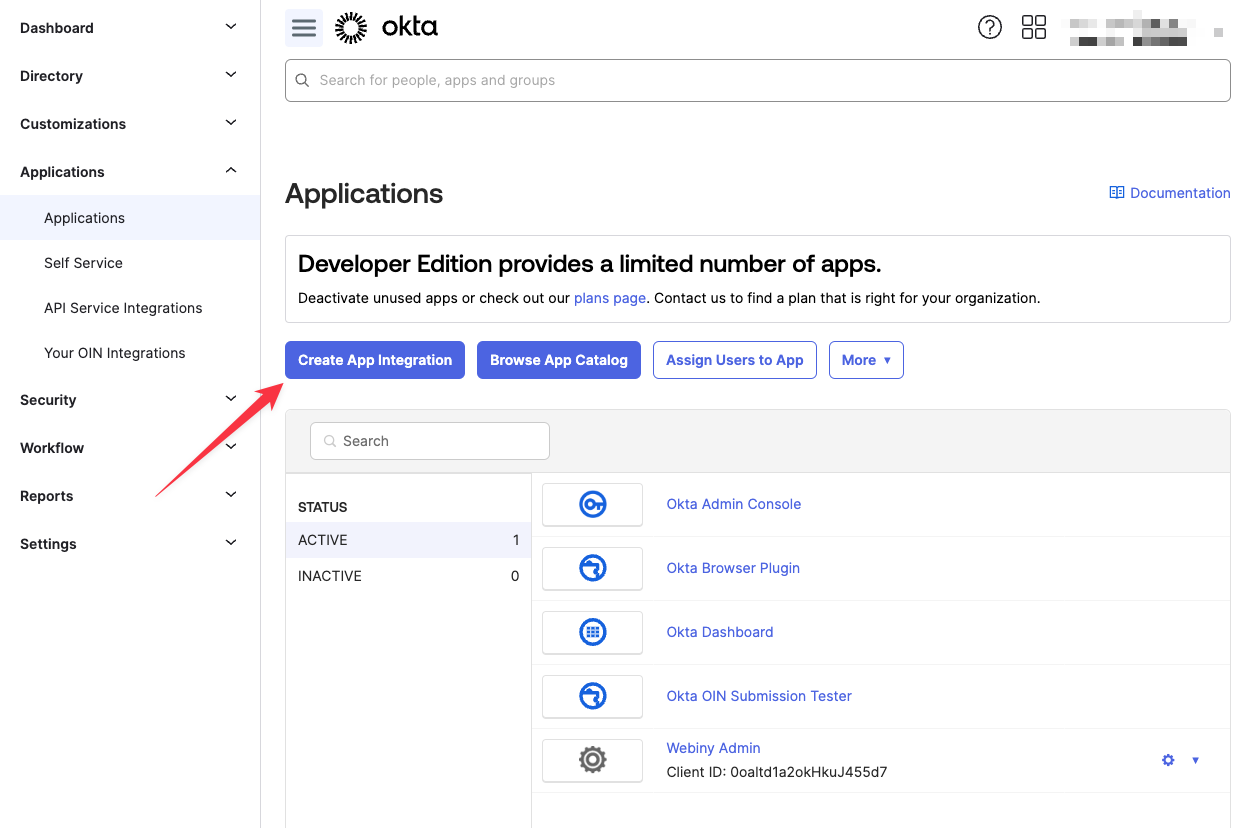
To create an OIDC app integration, navigate to Applications -> Applications, and click the Create App Integration button:
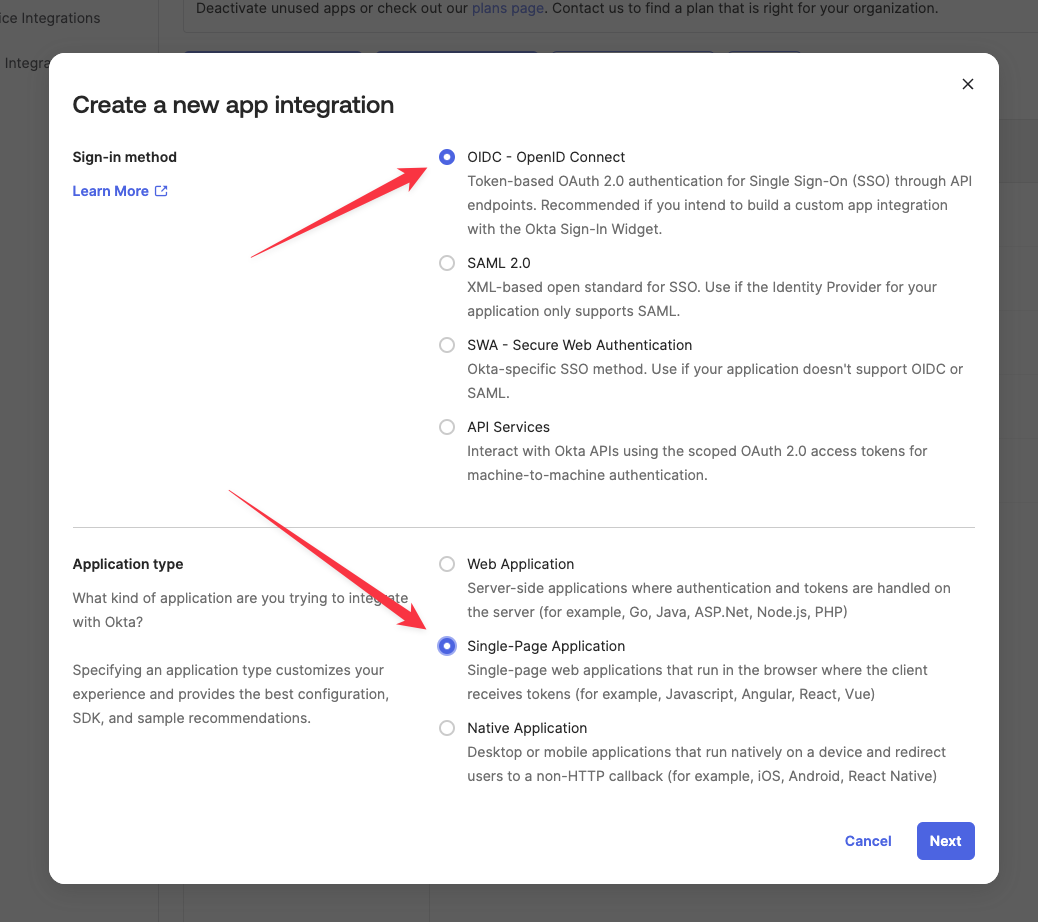
For Sign-in method, select OIDC - OpenID Connect. For Application type, select Single-Page Application, since we’ll communicate with this OIDC app from Webiny Admin app, which is a regular React single-page app. Then click Next.
The following image shows the general configuration of your OIDC app, with the most important parameters highlighted in red. Use this as a starting point, to get your integration working end to end. Then you can go back and tweak parameters to your liking.

Map Okta Groups to Webiny Roles
Once you have the app integration in place, you need to set up a connection between Okta users, and Webiny roles. In this example, we’ll be assigning users to Okta groups, and by doing that we want those users to automatically have certain application rights within Webiny.
To establish this connection, we need to do several things:
add a custom attribute to the OIDC app
assign Okta group(s) to the OIDC app
map the custom attribute to the
idTokenclaim, in the Okta authorization servermap the
idTokenclaim to Webiny identity in Webiny project
Add a Custom App Attribute
Navigate to Directory -> Profile Editor, find your OIDC app profile, and click it (click the profile name, not the “Mappings”, it’s a different thing).
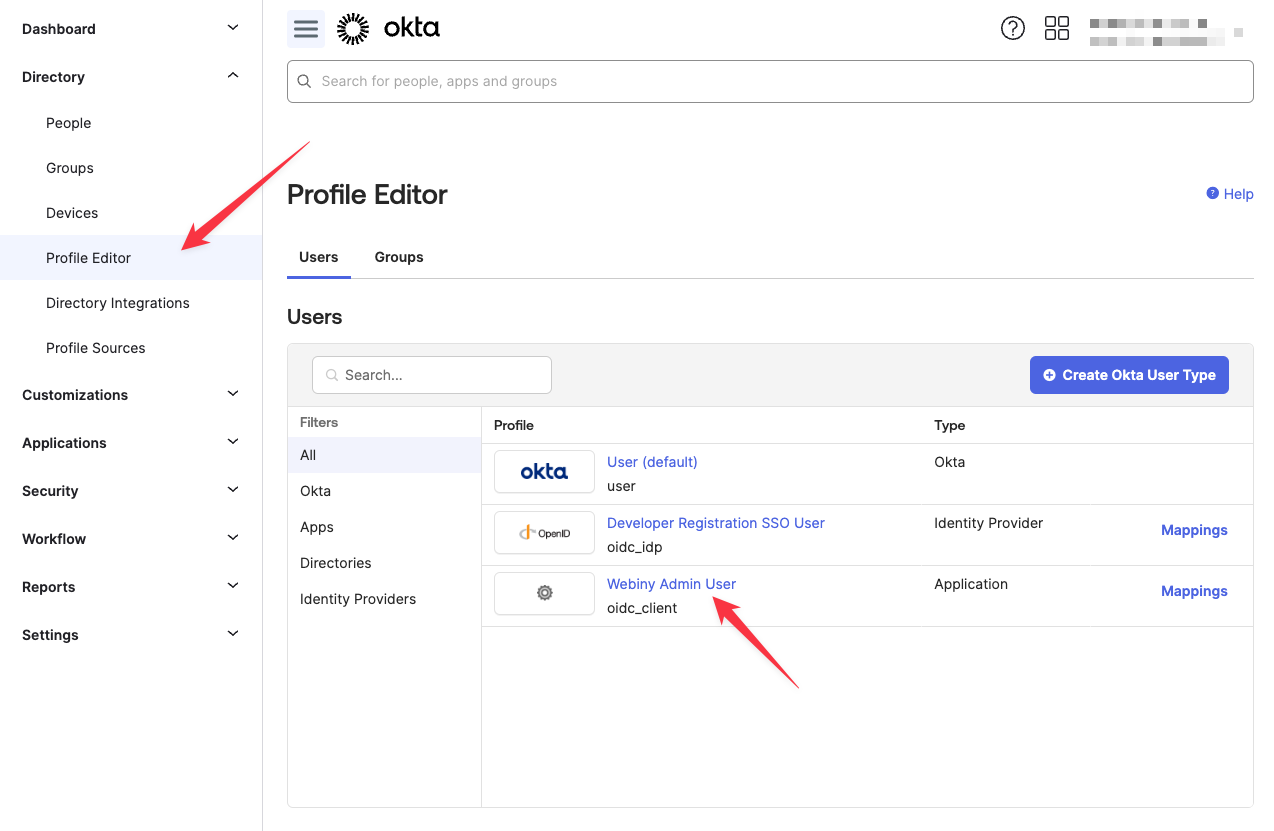
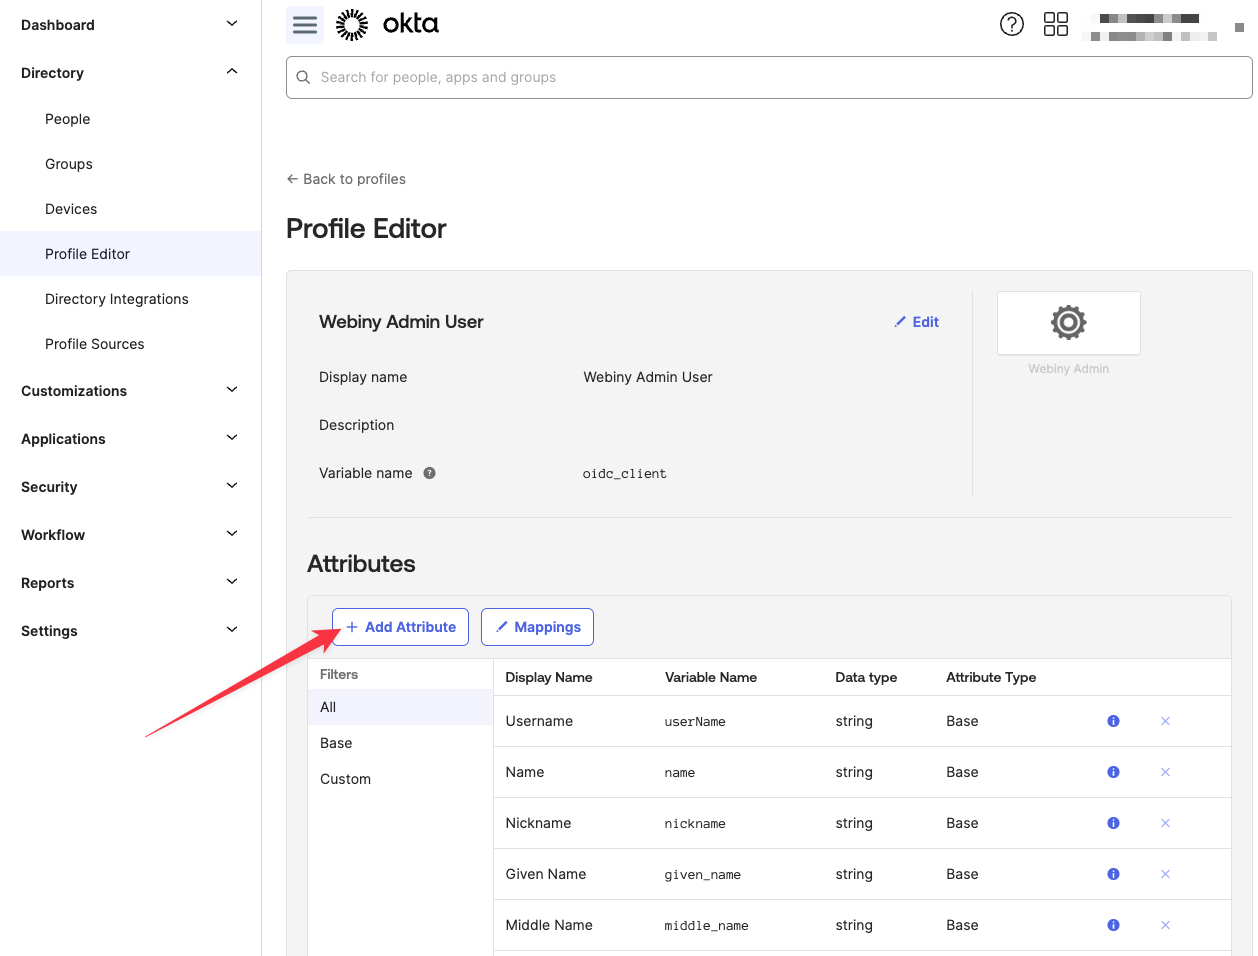
In the Profile Editor screen, click the Add Attribute button.
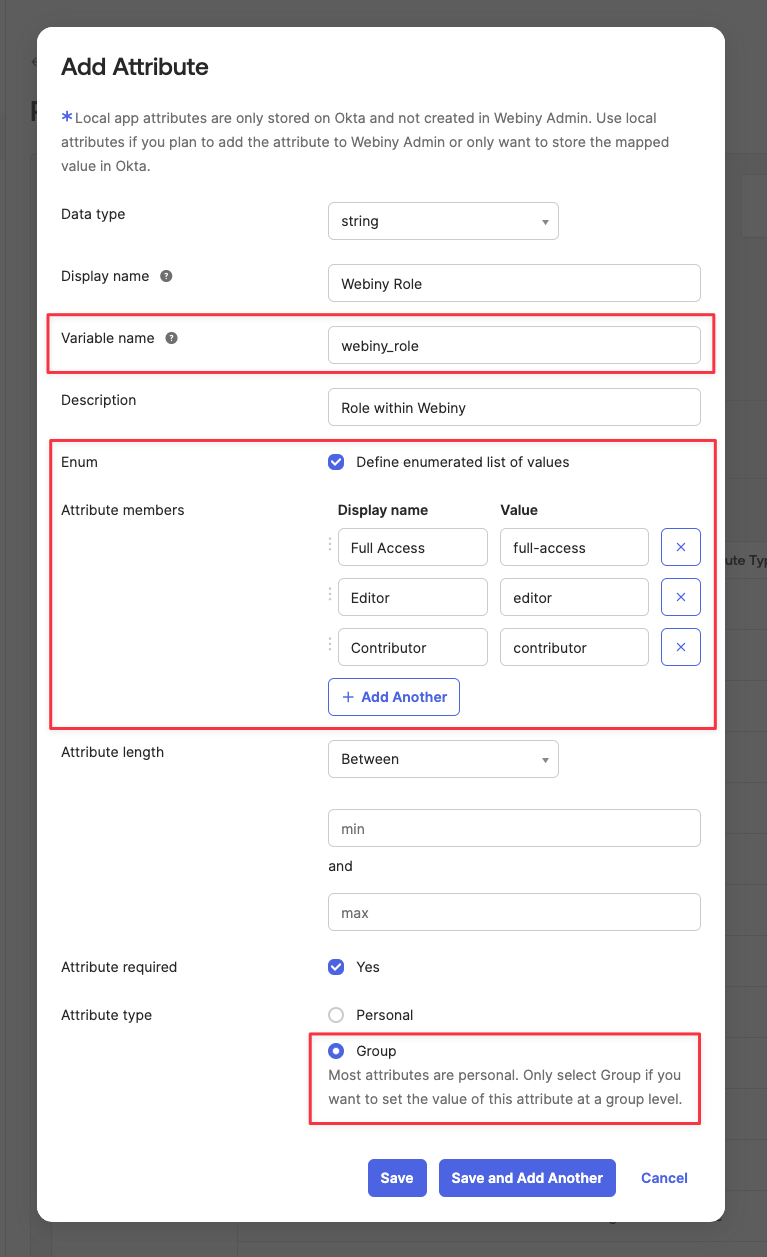
The important configuration parameters are highlighted in red. Variable name will be used to map this attribute value to the idToken claim. For Attribute members, it’s recommended to use enumerated list of values, to reduce the possibility of invalid mappings. Lastly, the Attribute type must be set to Group, to have this attribute be mapped when assigning Okta groups to the OIDC app.
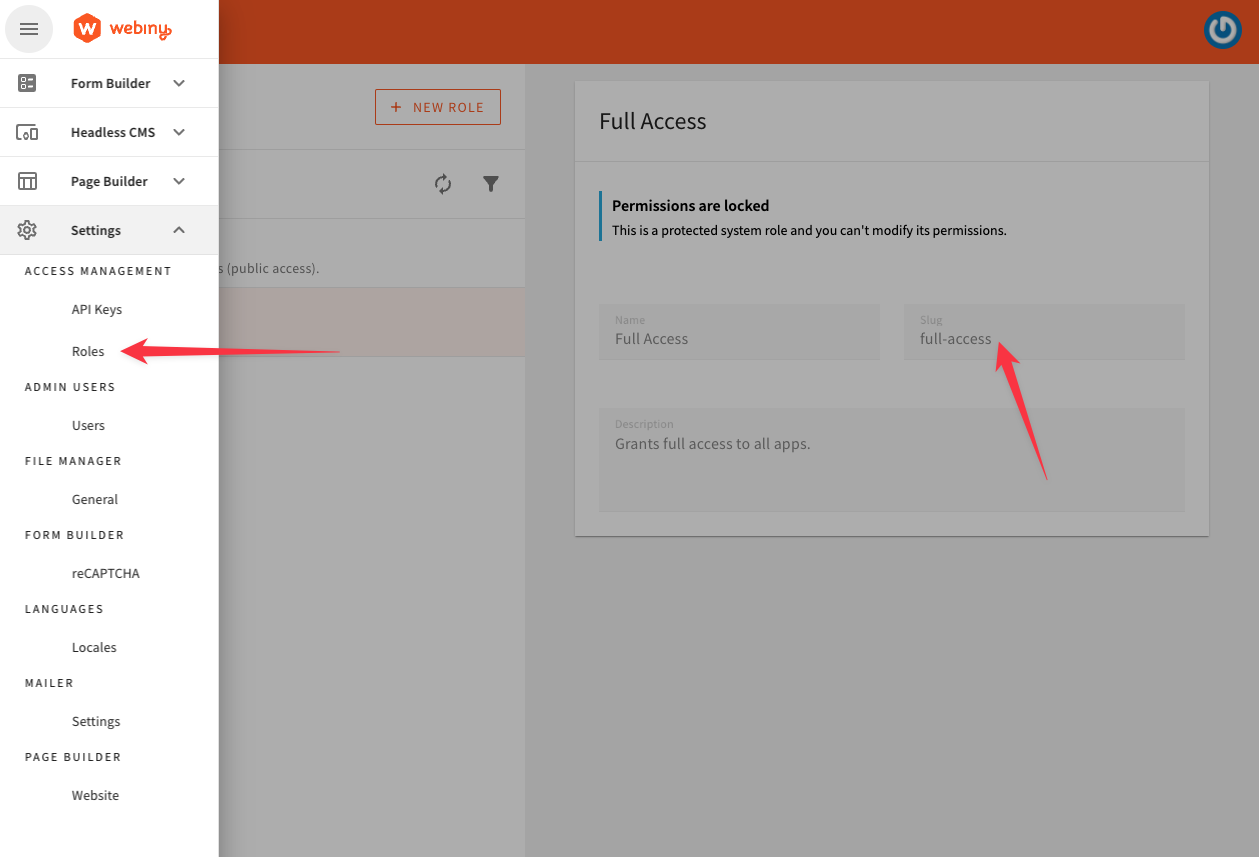
The value of roles are actually role slugs, taken from the Webiny Admin app. To manage Webiny Roles, navigate to Settings -> Access Management -> Roles in your Webiny Admin app.
Assign Okta Groups to the OIDC App
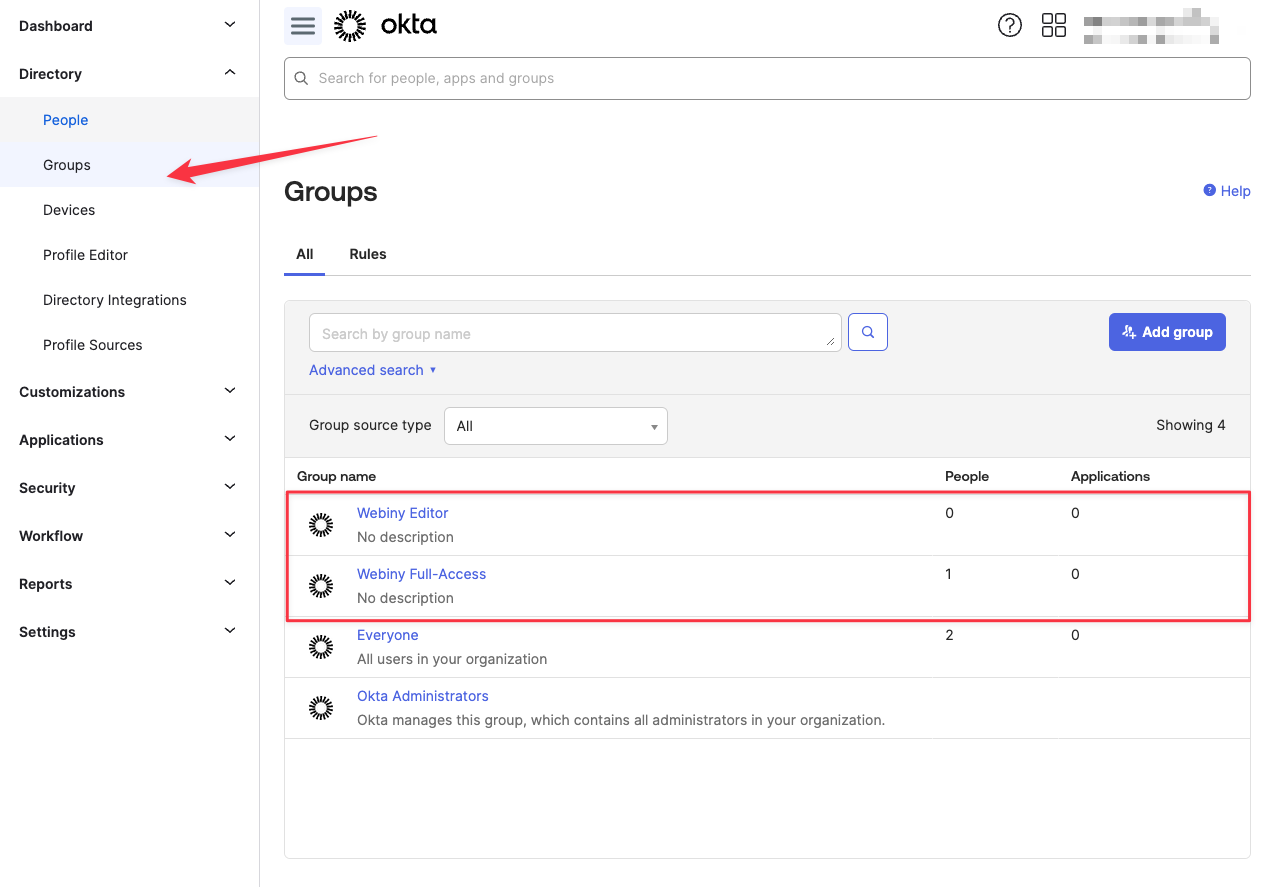
Now you need to assign your Okta groups to the OIDC app. Navigate to Directory -> Groups. Here you’ll find a list of all Okta groups. If you haven’t already, create the desired user groups. Each user group will map to one of the Webiny roles in Webiny.
Find a group you want to assign to your app, and edit it (click the group name).
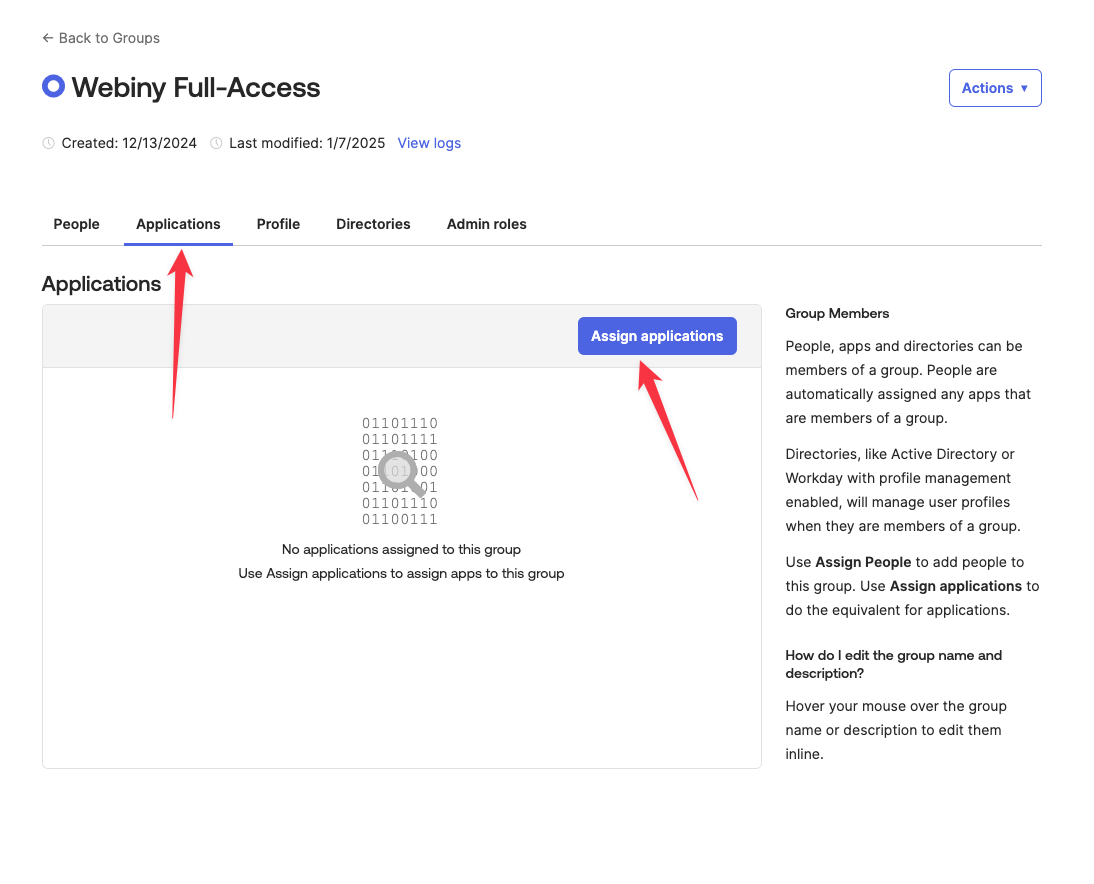
Navigate to the Applications tab, and click Assign Applications.
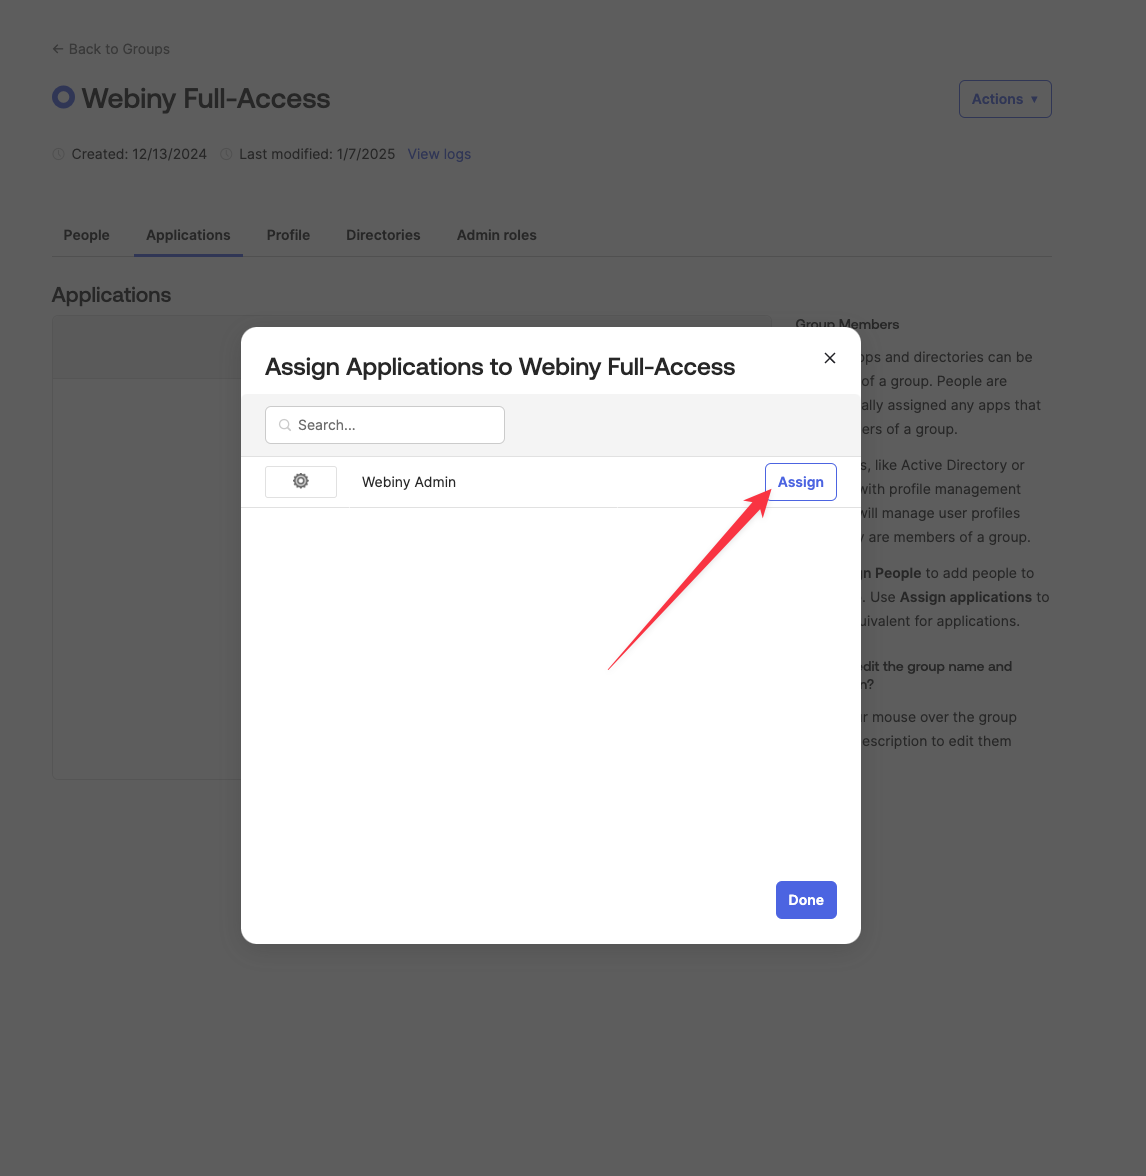
In the dialog, a list of applications is shown. Select the application you want to assign to the group by clicking the Assign button.
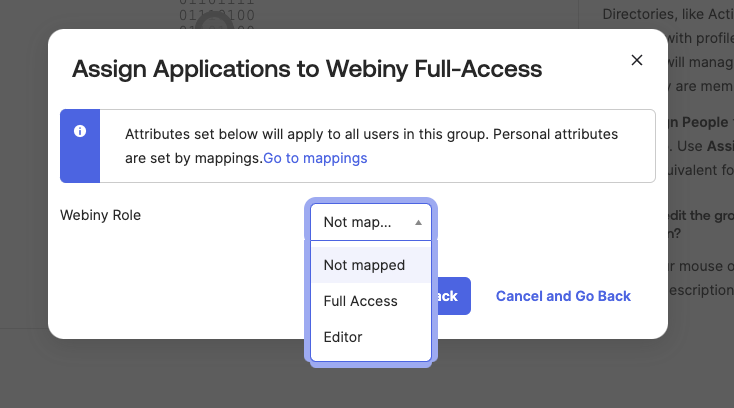
Okta will ask you to map the Webiny Role custom attribute we defined earlier. Select one of the predefined Webiny roles. All the users assigned to this Okta group, will automatically assume that particular Webiny role when accessing Webiny.
Map Attribute to Token Claim
When the user logs into Okta, and navigates to Webiny Admin app, Webiny will use the user’s idToken to communicate with the Webiny API. You need to pass the information about user’s Okta group to Webiny, using a custom claim in the idToken.
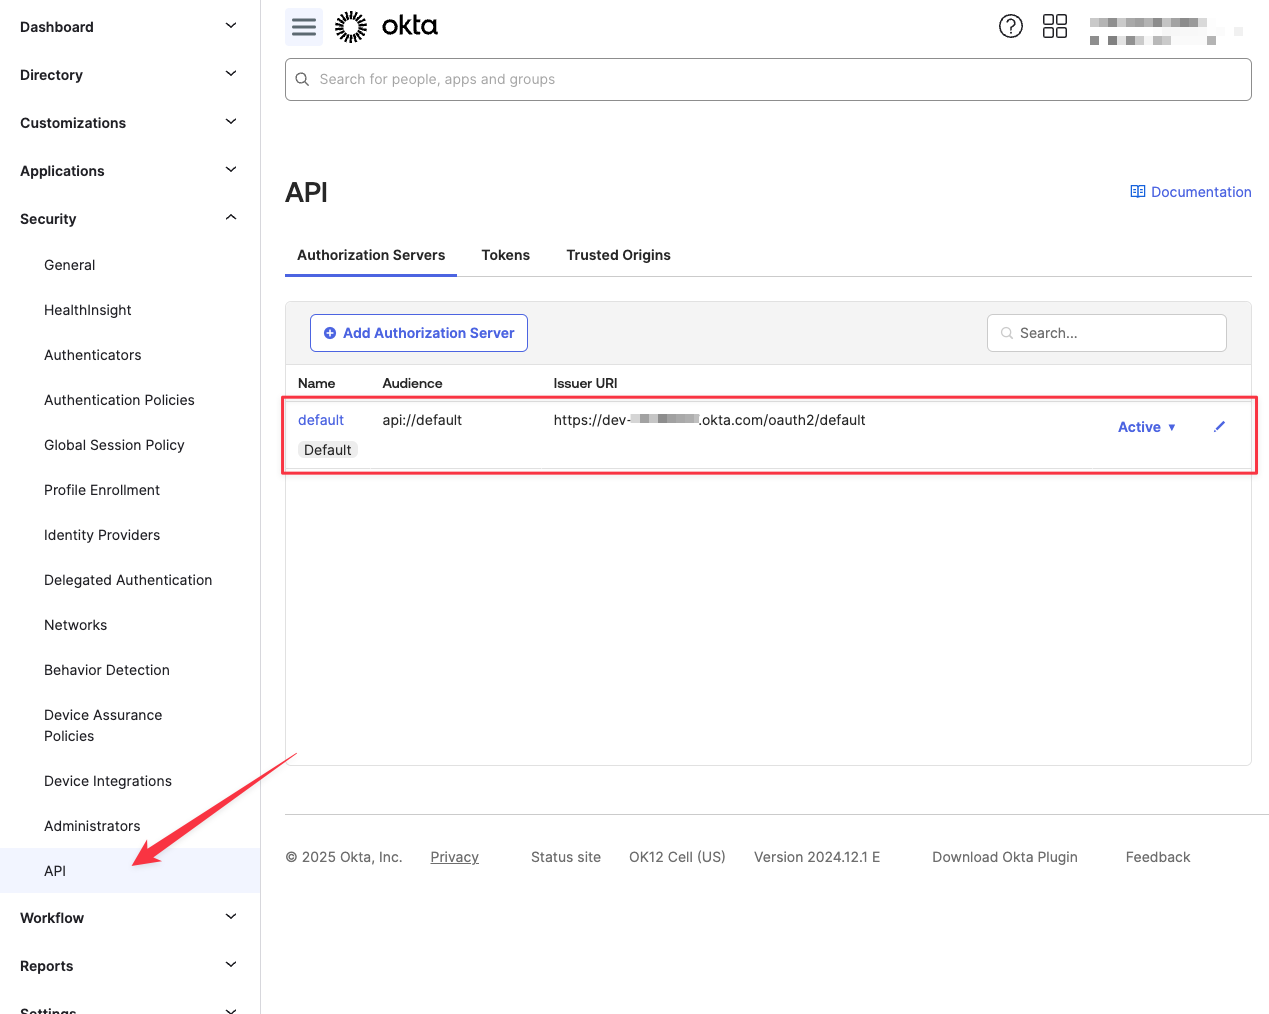
In the Okta dashboard, Navigate to Security -> API, and access your desired authorization server.
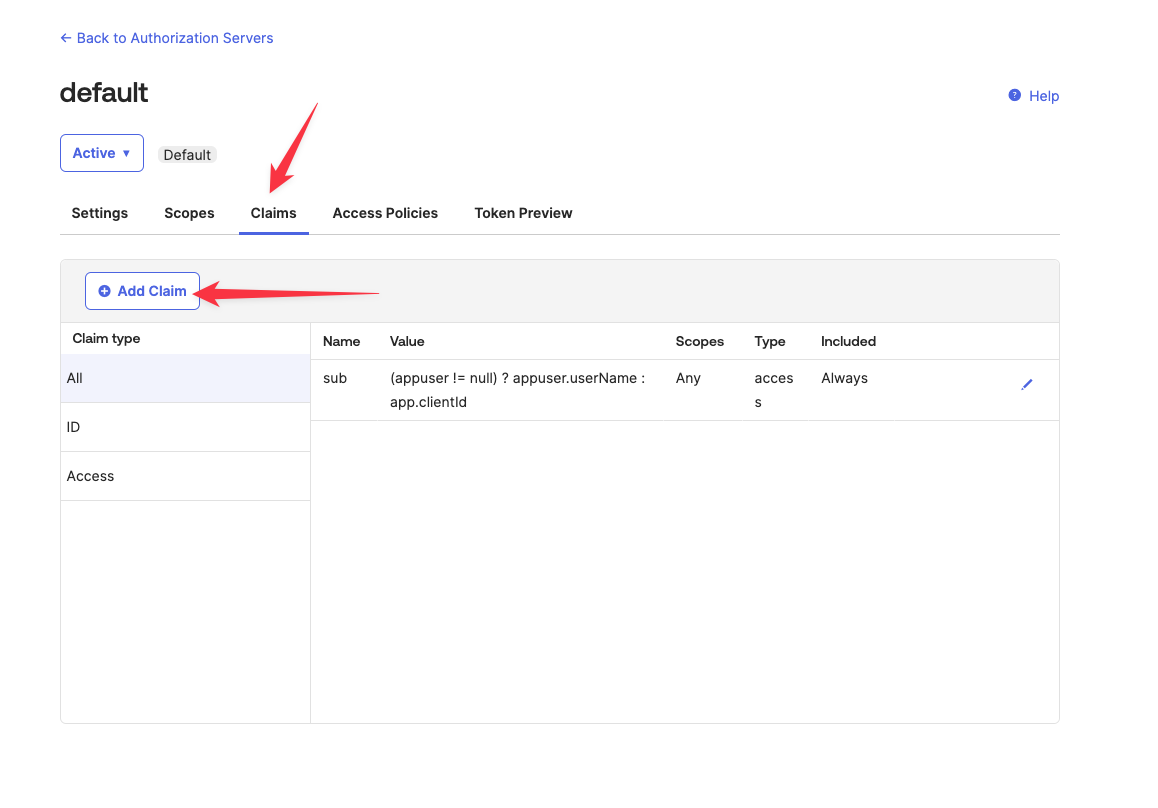
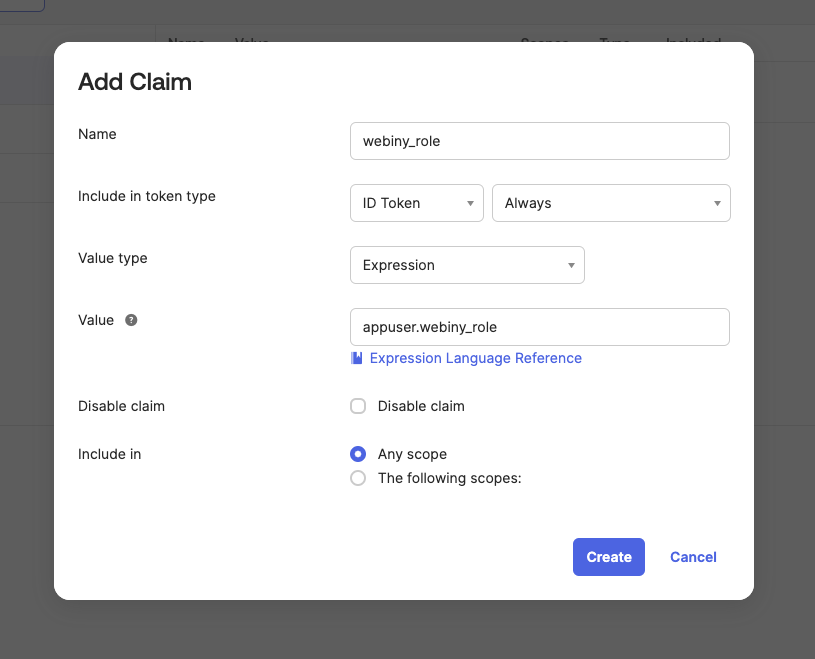
Switch to the Claims tab, and click Add Claim.
Make sure your claim is included in ID Token. The appuser.webiny_role expression means that the value for the claim will come from the current user, using the webiny_role attribute value, which the user inherits from the Okta group he is assigned to.
Test Your Configuration
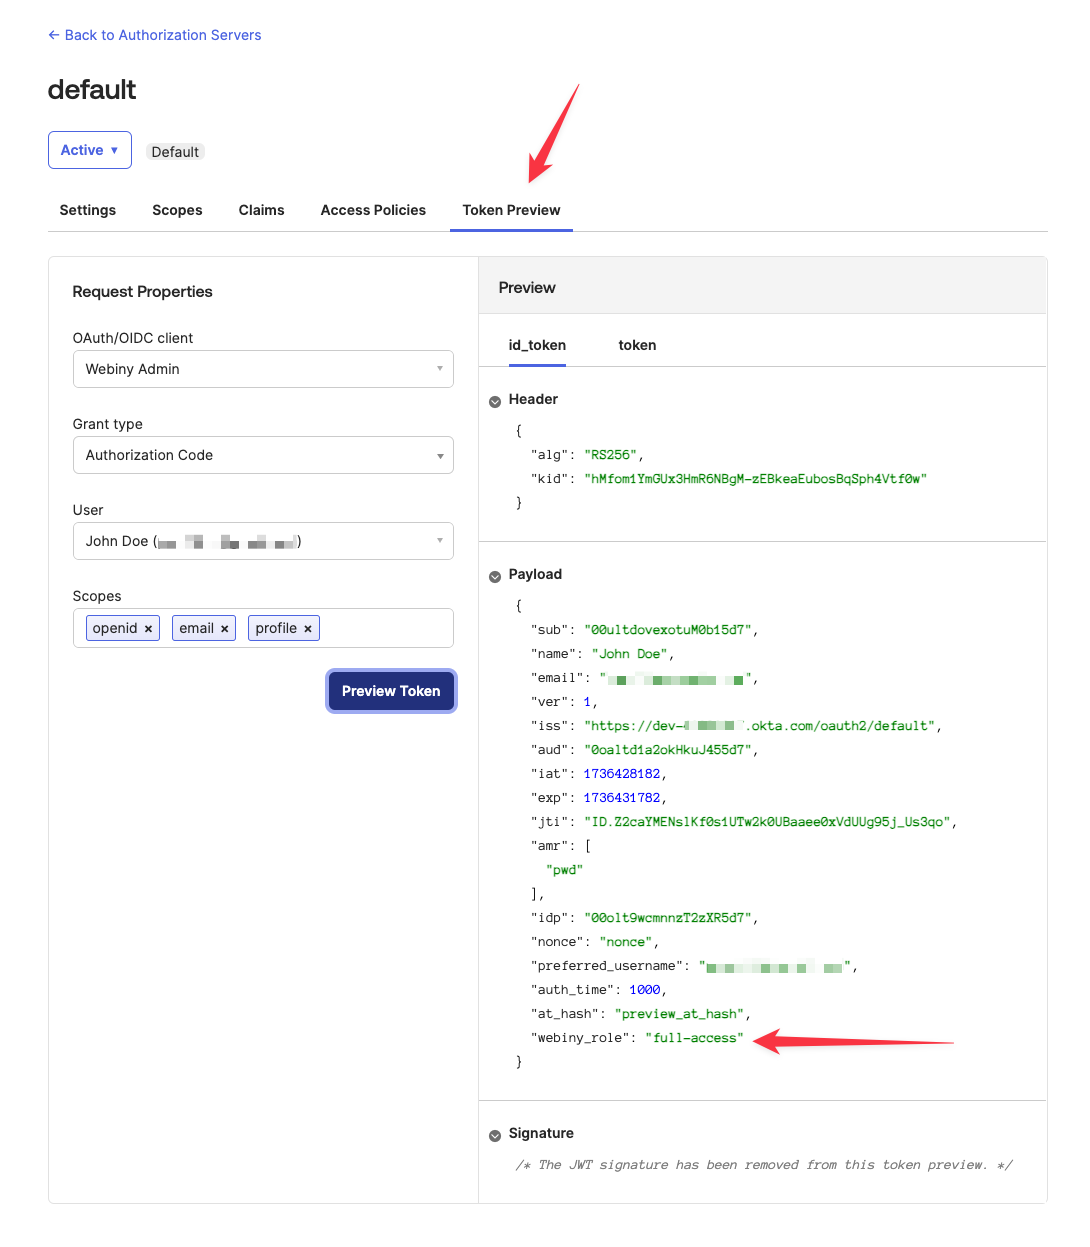
To test whether the configuration is correct, you can use the Token Preview tab of the authorization server. Select your OIDC app, a grant type of Authorization Code, and a user you want to test with. You also need to select at least one scope to generate the token preview. The scopes used by the actual app are openid, profile, and email.
If everything is configured correctly, your idToken will contain a webiny_role claim, and its value will correspond to the Webiny Role custom attribute, which was assigned to the Okta group earlier.
Final Steps
At this point, the basic setup of your Okta OIDC app can be considered done. However, to connect all the dots, you need to map this token claim to the identity object in your main Okta security configuration.